
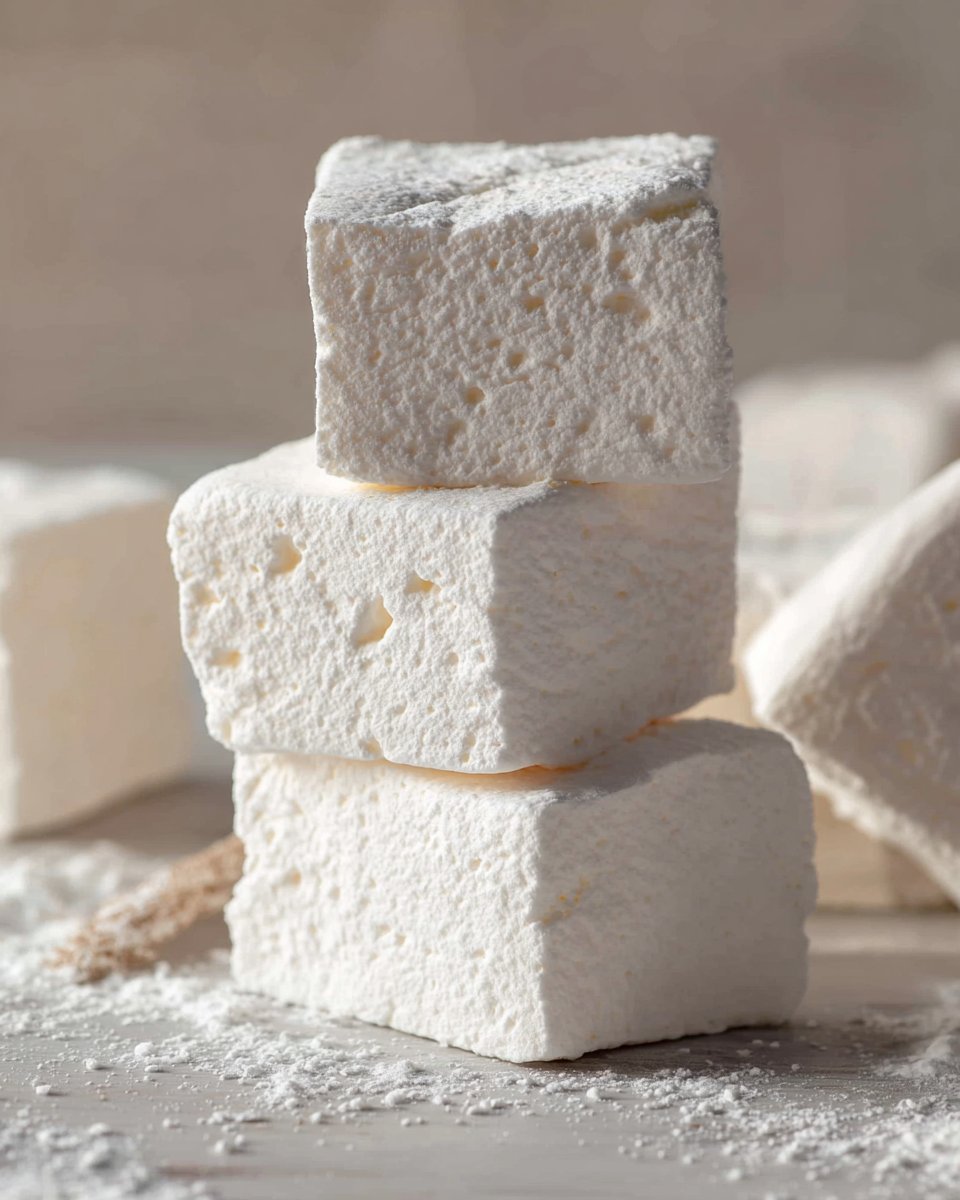
Homemade Marshmallows
Homemade marshmallows are a cloudlike treat with a pillowy texture, sweet vanilla aroma, and melt-in-your-mouth taste that store-bought versions rarely match. These marshmallows are soft and springy with a smooth interior and slightly tacky exterior that is dusted in confectioners sugar and cornstarch to keep them from sticking. They smell warmly of vanilla and light sugar, and the texture is buoyant enough for hot chocolate, s’mores, or nibbling straight from the pan. This recipe is ideal for gifting, holiday baking, or when you want to impress friends with a homemade confection that is surprisingly simple to make. With minimal ingredients and a little patience while the mixture sets, you will end up with fresh, tender marshmallows that are far superior to packaged versions.
Ingredients
- 1/3 cup confectioners’ sugar, for dusting and to prevent sticking.
- 3 Tablespoons cornstarch, mixed with the confectioners’ sugar to make a nonstick coating.
- 3/4 ounce unflavored gelatin (3 standard 1/4-ounce packets), provides structure and the classic marshmallow bounce.
- 1 cup cold water, divided, used to bloom the gelatin and to make the sugar syrup.
- 1 cup light corn syrup, helps keep marshmallows smooth and prevents crystallization.
- 1 and 1/2 cups granulated sugar, the primary sweetener and body of the marshmallow.
- 1/4 teaspoon salt, balances sweetness and enhances flavor.
- 1 Tablespoon pure vanilla extract, adds warm, familiar flavor.
Step-by-step Instructions
-
Prepare the pan. Generously spray a 9×13-inch baking pan with cooking spray, then dust it with a mixture of the confectioners’ sugar and cornstarch. Tip: tap out excess so the coating is even but not clumpy.
-
Bloom the gelatin. In a medium bowl, combine the unflavored gelatin and 1/2 cup of the cold water. Let it sit undisturbed while you prepare the sugar syrup so the gelatin soaks up the water and becomes spongy.
-
Make the sugar syrup. In a medium saucepan, combine the remaining 1/2 cup cold water, the light corn syrup, the granulated sugar, and the salt. Stir over medium heat until the sugar dissolves, then continue to cook without stirring until the mixture reaches the soft ball stage, 235 to 240 degrees F. Tip: use a candy thermometer for accuracy.
-
Combine syrup and gelatin. Remove the saucepan from the heat and let the syrup cool for 5 minutes. With the mixer running on low, slowly pour the warm syrup into the bowl with the bloomed gelatin. Pour carefully to avoid splashing.
-
Whip to glossy peaks. Increase the mixer speed to high and whip the mixture until it becomes thick, glossy, and nearly tripled in volume, about 10 to 15 minutes. Add the vanilla extract in the last minute of whipping for even flavor distribution. Tip: the mixture should be thick and ribbon-like when the beaters are lifted.
-
Set the marshmallows. Pour the whipped mixture into the prepared 9×13-inch pan, spreading it evenly. Let it sit uncovered at room temperature for at least 6 hours to set fully.
-
Cut and coat. Once set, dust a cutting board with the reserved confectioners’ sugar and cornstarch mixture. Invert the marshmallows onto the board, peel off the pan lining if necessary, and cut into squares with a sharp knife or pizza cutter. Toss the cut pieces lightly in the sugar and cornstarch mixture to coat the edges and prevent sticking.
-
Store. Place the marshmallows in an airtight container and store at room temperature for up to 2 weeks.
Recipe Details
- Prep Time: 20 minutes active
- Cook Time: 15 minutes active, plus 6 hours resting to set
- Total Time: 6 hours 35 minutes
- Servings: about 40 marshmallows, depending on cut size
- Calories: approximately 60 calories per marshmallow
Tips, Storage & Variations
-
Tips:
- Use a reliable candy thermometer to reach the soft ball stage for the correct texture.
- Beat long enough until the mixture is glossy and holds shape, or the marshmallows will be dense.
- For easier cutting, lightly oil the knife or dust it with the sugar mix between cuts.
-
Storage and freezing:
- Store marshmallows in an airtight container at room temperature, away from heat or humidity, for up to 2 weeks.
- To freeze, place marshmallows in a single layer in an airtight container or freezer bag for up to 3 months. Thaw at room temperature before serving.
-
Flavor variations using only the provided ingredients:
- Vanilla-forward marshmallows: increase the vanilla extract to 2 teaspoons for a stronger vanilla note.
- Milder marshmallows: omit the vanilla extract for a neutral, classic marshmallow taste.
- Slightly sweeter finish: reduce the salt to 1/8 teaspoon if you prefer a sweeter final product.
FAQ
-
How long do homemade marshmallows take to set?
They need at least 6 hours at room temperature to fully set, longer is fine for a firmer texture. -
Can I make marshmallows without a candy thermometer?
A thermometer is recommended for accuracy, but you can test the syrup using the soft ball test in cold water if needed. -
Why did my marshmallows turn out sticky?
If not coated well in the confectioners’ sugar and cornstarch mix or stored in humidity, marshmallows can become sticky. Re-dust them before storing. -
Can I use flavored extract instead of vanilla?
Yes, use one of the extracts listed in the ingredients only if available. This recipe as written uses pure vanilla extract. -
How should I cut marshmallows cleanly?
Use a sharp knife or pizza cutter dusted in the sugar mixture, or lightly oil the blade to prevent sticking. -
Are homemade marshmallows vegetarian?
These are not vegetarian if the gelatin used is animal-derived. Check gelatin packaging for source details.
People Also Ask
-
What is the soft ball stage for marshmallows?
The soft ball stage is when the sugar syrup forms a soft, pliable ball in cold water, typically 235 to 240 degrees F. -
Can I speed up the setting time of marshmallows?
Setting is largely chemical and temperature dependent, so it is best to allow the full resting time at room temperature for proper texture. -
Why do marshmallows need corn syrup?
Corn syrup helps prevent sugar crystallization and keeps the marshmallows smooth and tender. -
What type of pan is best for marshmallows?
A 9×13-inch baking pan works well for even thickness and easy cutting. -
Can I make marshmallows in different shapes?
Yes, pour into molds or cut into shapes after setting for fun variations. -
How do I prevent marshmallows from drying out?
Store them in an airtight container and keep them away from heat and moisture. -
Is there a way to make marshmallows chewier?
Whipping longer until the mixture is thicker can give a slightly chewier texture once set. -
Can I double this recipe?
You can scale the recipe, but be cautious with mixer capacity and pan size to maintain proper whipping and setting.
Conclusion
I hope you enjoy making these Homemade Marshmallows, a simple yet rewarding recipe that yields soft, fragrant marshmallows ideal for hot chocolate, s’mores, or gifts. For additional tips and troubleshooting, you might find this detailed guide helpful: How To Make Homemade Marshmallows (Foolproof Guide). If you want another reliable take on homemade marshmallow technique, this resource is excellent: How to Make Homemade Marshmallows – Sally’s Baking Addiction. Share your results and any flavor tweaks you try, and enjoy a cozy moment with a homemade treat.